
I missed out last month- but there was no way I wasnt going to have a go at Scrap Jacked this month!

After much deliberation I decided to "Jack" this gorgeous LO by Vicki!


 This month's Scrap the Girls challenge was a sketch challenge! Here is my entry- using some yummy hand made flowers from Marg Oliver!


 My next class is on Friday 18th March- there is a very girly girl layout- and due to popular demand I'll be spending tomorrow creating a boy version too! Check back here soon for some sneak peaks!


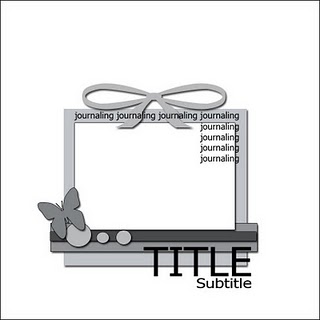
I gave the sketch below a mirror flip to create the layout about the kids getting to meet the hosts of Saturday Disney back in December.


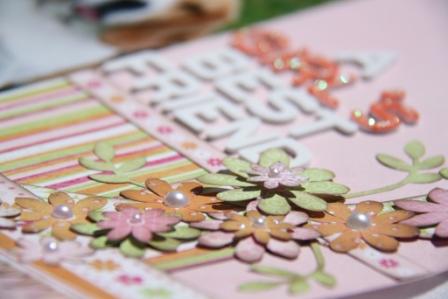
 And yesterday I broke the LO drought, and created 2 LOs. Cant show the full LOs yet as they will hopefully become class LO's at Scraphaven, so here are some sneaks.
"A Girl's best friend", using Kaisercraft "Candy Lane" range and my trade mark fussy cutting!
And yesterday I broke the LO drought, and created 2 LOs. Cant show the full LOs yet as they will hopefully become class LO's at Scraphaven, so here are some sneaks.
"A Girl's best friend", using Kaisercraft "Candy Lane" range and my trade mark fussy cutting!
 And a back to school style LO using MME Alphabet Soup papers.
 Hopefully I have broken the mojo drought and you'll be seeing LOs coming thick and fast!


Step 3- Fold in half again.
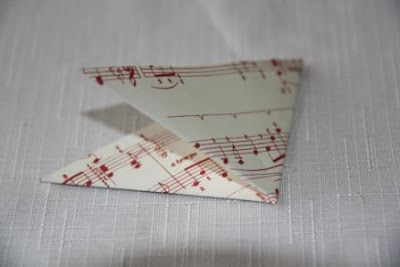
Step 4- Starting at the 2 open edges, cut a horizontal line approx 1/3 of the way up from the bottom of the page, stopping approx 1/4" (0.5cm) from the folded edge. Repeat the cut 1/3 down from the top point.

Step 5- Open the triangle back out to a square.

Step 6- Starting from the middle, roll the two points together (rolling it over something makes it easier!) and glue. You can use double sided tape, glue dots, hot glue gun.... whatever you like to use- but it does need to be a strong adhesive. (Give consideration to which side of your double sided paper you want to be the prominent side. I wanted the musical paper to be the most prominent so I rolled it first. If I wanted the stripes to be the most prominent I would have flipped the paper over.)

Step 7- Flip the page over and adhere the next 2 points together.

Step 8- Flip the paper back over and glue the last 2 points together. You should have 2 rolls going in one direction, and one roll going the other direction. Repeat for all 8 squares.

Step 9- Glue the 2 middle rolls together- in this case making sure that the pattern is going in the same direction, so one music roll adhering to one striped roll. Step 10- Glue the bottom 2 points together. Repeat to create 4 sets of 2.

Step 11- In the same way as step 10, glue 2 sets of 2 together in the middle, again making sure that the patterns are going in the right directions. You will now have 2 halves of the star.

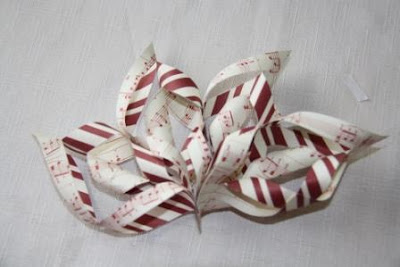
Step 12- Now glue the 2 halves together, making sure the patterns are continuing around the whole star. Glue the middles first, and then glue the centre (overlapping the 2 halves' points)

Step 13- Make a hole at the top of one of the points and thread some stranded floss, string or ribbon through it to make a hanging loop.


45 minutes before I was due to leave for Black Forest Region Guide Leaders Christmas dinner tonight I decided that the plain white gift bags I was putting their gifts in was just not up to my standard! So I quickly decorated them! And here are the 5 quick steps in takes for you to make them at home!

Red Cardstock- cut to size of bag and border punch the edges.
Echo Park paper- cut to size and ink edges.
Add white thickers for name
Cut out ornaments from Echo Park paper, doddle on them and stick them on- mounting one with foam tape! Voila! 8 Gift Bags decorated in less that 45 minutes!


