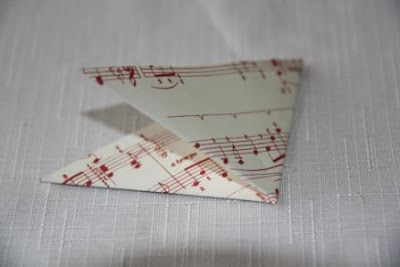
Step 3- Fold in half again.
Step 4- Starting at the 2 open edges, cut a horizontal line approx 1/3 of the way up from the bottom of the page, stopping approx 1/4" (0.5cm) from the folded edge. Repeat the cut 1/3 down from the top point.
Step 5- Open the triangle back out to a square.
Step 6- Starting from the middle, roll the two points together (rolling it over something makes it easier!) and glue. You can use double sided tape, glue dots, hot glue gun.... whatever you like to use- but it does need to be a strong adhesive. (Give consideration to which side of your double sided paper you want to be the prominent side. I wanted the musical paper to be the most prominent so I rolled it first. If I wanted the stripes to be the most prominent I would have flipped the paper over.)
Step 7- Flip the page over and adhere the next 2 points together.
Step 8- Flip the paper back over and glue the last 2 points together. You should have 2 rolls going in one direction, and one roll going the other direction. Repeat for all 8 squares.
Step 9- Glue the 2 middle rolls together- in this case making sure that the pattern is going in the same direction, so one music roll adhering to one striped roll.
Step 11- In the same way as step 10, glue 2 sets of 2 together in the middle, again making sure that the patterns are going in the right directions. You will now have 2 halves of the star.
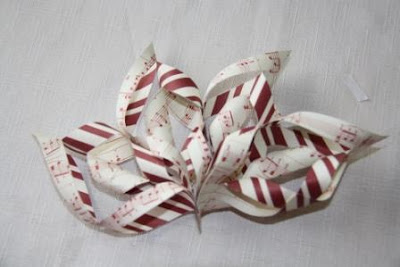
Step 12- Now glue the 2 halves together, making sure the patterns are continuing around the whole star. Glue the middles first, and then glue the centre (overlapping the 2 halves' points)
Step 13- Make a hole at the top of one of the points and thread some stranded floss, string or ribbon through it to make a hanging loop.


1 comment:
Ha ha same thing happened when I posted mine on my FB page. LOL, now like 6 of my FB friends are making them today. :-) It's awesome how complicated and beautiful they look; yet so easy to make. Very pretty.
pookie
Post a Comment